PDFs
PDF generation in an application is typically a required feature for any application that does any type of in-depth reporting or data exporting. Many applications may require this exported data to be in a concise, well-formatted and portable document and PDF provides this.
The PDF specification, as well as its shared assets’ specifications, such as fonts and images, are an extremely large and complex set of rules and syntax. This component attempts to harness the power and features defined by those specifications and present an intuitive API that puts the power of PDF at your fingertips.
Building a PDF
At the center of the popphp/pop-pdf component is the main Pop\Pdf\Pdf class. It serves
as a manager or controller of sorts for all of the various PDF assets that will pass through
during the process of PDF generation. The different assets are each outlined with their own
section below.
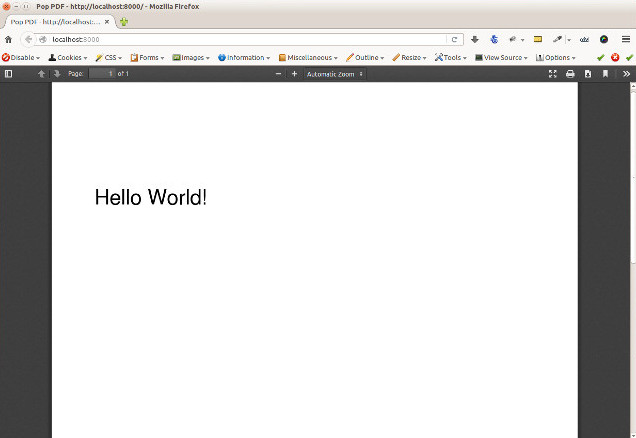
Here’s a simple example building and generating a PDF document with some text. The finer points of what’s happening will be explained more in depth in the later sections.
use Pop\Pdf\Pdf;
use Pop\Pdf\Document;
use Pop\Pdf\Document\Font;
use Pop\Pdf\Document\Page;

// Create a page and add the text to it
$page = new Page(Page::LETTER);
$page->addText(new Page\Text('Hello World!', 24), Font::ARIAL, 50, 650);

// Create a document, add the font to it and then the page
$document = new Document();
$document->addFont(new Font(Font::ARIAL));
$document->addPage($page);

// Pass the document to the Pdf object to build it and output it to HTTP
$pdf = new Pdf();
$pdf->outputToHttp($document);
Importing a PDF
Importing an existing PDF or pages from one may be required in your application. Using the main PDF object, you can specify the pdf to import as well as the select pages you may wish to import. From there you can either select pages to modify or add new pages to the document. When you do import an existing PDF, the method will return a parsed and working document object. In the example below, we will import pages 2 and 5 from the existing PDF, add a new page in between them and then save the new document:
use Pop\Pdf\Pdf;
use Pop\Pdf\Document;
use Pop\Pdf\Document\Font;
use Pop\Pdf\Document\Page;

$pdf = new Pdf();
$document = $pdf->importFromFile('doc.pdf', [2, 5])

// Create a page and add the text to it
$page = new Page(Page::LETTER);
$page->addText(new Page\Text('Hello World!', 24), Font::ARIAL, 50, 650);

// Create a document, add the font to it and then the page
$document = new Document();
$document->addFont(new Font(Font::ARIAL));
$document->addPage($page);
$document->orderPages([1, 3, 2]); // 3 being our new page.

// Pass the document to the Pdf object to build it and write it to a new file
$pdf = new Pdf();
$pdf->writeToFile('new-doc.pdf');
When the 2 pages are imported in, they default to page 1 and 2, respectively. Then we can add any
pages we need from there and control the final order of the pages with the orderPages method
like in the above example.
If you wish to import the whole PDF and all of its pages, simply leave the $pages parameter blank.
Coordinates
It should be noted that the PDF coordinate system has its origin (0, 0) at the bottom left. In the example above, the text was placed at the (x, y) coordinate of (50, 650). When placed on a page that is set to the size of a letter, which is 612 points x 792 points, that will make the text appear in the top left. It the coordinates of the text were set to (50, 50) instead, the text would have appeared in the bottom left.
As this coordinate system may or may not suit a developer’s personal preference or the requirements of the application, the origin point of the document can be set using the following method:
use Pop\Pdf\Document;

$document = new Document();
$document->setOrigin(Document::ORIGIN_TOP_LEFT);
Now, with the document’s origin set to the top left, when you place assets into the document, you can base it off of the new origin point. So for the text in the above example to be placed in the same place, the new (x, y) coordinates would be (50, 142).
Alternatively, the full list of constants in the Pop\Pdf\Document class that represent the
different origins are:
- ORIGIN_TOP_LEFT
- ORIGIN_TOP_RIGHT
- ORIGIN_BOTTOM_LEFT
- ORIGIN_BOTTOM_RIGHT
- ORIGIN_CENTER
Documents
A document object represents the top-level “container” object of the the PDF document. As you create the various assets that are to be placed in the PDF document, you will inject them into the document object. At the document level, the main assets that can be added are fonts, forms, metadata and pages. The font and form objects are added at the document level as they can be re-used on the page level by other assets. The metadata object contains informational data about the document, such as title and author. And the page objects contain all of the page-level assets, as detailed below.
Fonts
Font objects are the global document objects that contain information about the fonts that can be used by the text objects within the pages of the document. A font can either be one of the standard fonts supported by PDF natively, or an embedded font from a font file.
Standard Fonts
The set of standard, native PDF fonts include:
- Arial
- Arial,Italic
- Arial,Bold
- Arial,BoldItalic
- Courier
- Courier-Oblique
- Courier-Bold
- Courier-BoldOblique
- CourierNew
- CourierNew,Italic
- CourierNew,Bold
- CourierNew,BoldItalic
- Helvetica
- Helvetica-Oblique
- Helvetica-Bold
- Helvetica-BoldOblique
- Symbol
- Times-Roman
- Times-Bold
- Times-Italic
- Times-BoldItalic
- TimesNewRoman
- TimesNewRoman,Italic
- TimesNewRoman,Bold
- TimesNewRoman,BoldItalic
- ZapfDingbats
When adding a standard font to the document, you can add it and then reference it by name throughout
the building of the PDF. For reference, there are constants available in the Pop\Pdf\Document\Font
class that have the correct standard font names stored in them as strings.
use Pop\Pdf\Document;
use Pop\Pdf\Document\Font;

$font = new Font(Font::TIMES_NEW_ROMAN_BOLDITALIC);

$document = new Document();
$document->addFont($font);
Now, the font defined as “TimesNewRoman,BoldItalic” is available to the document and for any text for which you need it.
Embedded Fonts
The embedded font types that are supported are:
- TrueType
- OpenType
- Type1
When embedding an external font, you will need access to its name to correctly reference it by string much in the same way you do for a standard font. That name becomes accessible once you create a font object with an embedded font and it is successfully parsed.
Notice about embedded fonts
There may be issues embedding a font if certain font data or font files are missing, incomplete or corrupted. Furthermore, there may be issues embedding a font if the correct permissions or licensing are not provided.
use Pop\Pdf\Document;
use Pop\Pdf\Document\Font;
use Pop\Pdf\Document\Page;

$customFont = new Font('custom-font.ttf');

$document = new Document();
$document->embedFont($customFont);

$text = new Page\Text('Hello World!', 24);

$page = new Page(Page::LETTER);
$page->addText($text, $customFont->getName(), 50, 650);
The above example will attach the name and reference of the embedded custom font to that text object. Additionally, when a font is added or embedded into a document, its name becomes the current font, which is a property you can access like this:
$page->addText($text, $document->getCurrentFont(), 50, 650);
If you’d like to override or switch the current document font back to another font that’s available, you can do so like this:
$document->setCurrentFont('Arial');
Forms
Form objects are the global document objects that contain information about fields that are to be used within a Form object on a page in the document. By themselves they are fairly simple to use and inject into a document object. From there, you would add fields to a their respective pages, while attaching them to a form object.
The example below demonstrates how to add a form object to a document:
use Pop\Pdf\Document;
use Pop\Pdf\Document\Form;

$form = new Form('contact_form');

$document = new Document();
$document->addForm($form);
Then, when you add a field to a page, you can reference the form to attach it to:
use Pop\Pdf\Document\Page;

$name = new Page\Field\Text('name');
$name->setWidth(200)
     ->setHeight(40);

$page = new Page(Page::LETTER);
$page->addField($name, 'contact_form', 50, 650);
The above example creates a name field for the contact form, giving it a width and height and placing it at the (50, 650) coordinated. Fields will be covered more in depth below.
Metadata
The metadata object contains the document identifier data such as title, author and date. This is the data that is commonly displayed in the the document title bar and info boxes of a PDF reader. If you’d like to set the metadata of the document, you can with the following API:
use Pop\Pdf\Document;

$metadata = new Document\Metadata();
$metadata->setTitle('My Document')
    ->setAuthor('Some Author')
    ->setSubject('Some Subject')
    ->setCreator('Some Creator')
    ->setProducer('Some Producer')
    ->setCreationDate('August 19, 2015')
    ->setModDate('August 22, 2015')

$document = new Document();
$document->setMetadata($metadata);
And there are getter methods that follow the same naming convention to retrieve the data from the metadata object.
Pages
Page objects contain the majority of the assets that you would expect to be on a page within a PDF document. A page’s size can be either custom-defined or one of the predefined sizes. There are constants that define those predefine sizes for reference:
- ENVELOPE_10 (297 x 684)
- ENVELOPE_C5 (461 x 648)
- ENVELOPE_DL (312 x 624)
- FOLIO (595 x 935)
- EXECUTIVE (522 x 756)
- LETTER (612 x 792)
- LEGAL (612 x 1008)
- LEDGER (1224 x 792)
- TABLOID (792 x 1224)
- A0 (2384 x 3370)
- A1 (1684 x 2384)
- A2 (1191 x 1684)
- A3 (842 x 1191)
- A4 (595 x 842)
- A5 (420 x 595)
- A6 (297 x 420)
- A7 (210 x 297)
- A8 (148 x 210)
- A9 (105 x 148)
- B0 (2920 x 4127)
- B1 (2064 x 2920)
- B2 (1460 x 2064)
- B3 (1032 x 1460)
- B4 (729 x 1032)
- B5 (516 x 729)
- B6 (363 x 516)
- B7 (258 x 363)
- B8 (181 x 258)
- B9 (127 x 181)
- B10 (91 x 127)
use Pop\Pdf\Document\Page;

$legal  = new Page(Page::LEGAL);
$custom = new Page(640, 480);
The above example creates two pages - one legal size and one a custom size of 640 x 480.
Images
An image object allows you to place an image onto a page in the PDF document, as well as control certain aspects of that image, such as size and resolution. The image types that are supported are:
- JPG (RGB, CMYK or Grayscale)
- PNG (8-Bit Index)
- PNG (8-Bit Index w/ Transparency)
- PNG (24-Bit RGB or Grayscale)
- GIF (8-Bit Index)
- GIF (8-Bit Index w/ Transparency)
Here is an example of embedding a large image and resizing it down before placing on the page:
use Pop\Pdf\Document\Page;

$image = new Page\Image('large-image.jpg');
$image->resizeToWidth(320);

$page = new Page(Page::LETTER);
$page->addImage($image, 50, 650);
In the above example, the large image is processed (down-sampled) and resized to a width of 320 pixels and placed into the page at the coordinates of (50, 650).
If you wanted to preserve the image’s high resolution, but fit it into the smaller dimensions,
you can do that by setting the $preserveResolution flag in the resize method.
$image->resizeToWidth(320, true);
This way, the high resolution image is not processed or down-sampled and keeps its high quality. It is only placed into scaled down dimensions.
Color
With path and text objects, you will need to set colors to render them correctly. The main 3 colorspaces that are supported are RGB, CMYK and Grayscale. Each color space object is created by instantiating it and passing the color values:
use Pop\Pdf\Document\Page\Color;

$red  = new Color\Rgb(255, 0, 0);     // $r, $g, $b (0 - 255)
$cyan = new Color\Cmyk(100, 0, 0, 0); // $c, $m, $y, $k (0 - 100)
$gray = new Color\Gray(50);           // $gray (0 - 100)
These objects are then passed into the methods that consume them, like setFillColor and setStrokeColor
within the path and text objects.
Paths
Since vector graphics are at the core of PDF, the path class contains a robust API that allows you to no only draw various paths and shapes, but also set their colors and styles. On instantiation, you can set the style of the path object:
use Pop\Pdf\Document\Page\Path;
use Pop\Pdf\Document\Page\Color\Rgb;

$path = new Path(Path::FILL_STROKE);
$path->setFillColor(new Rgb(255, 0, 0))
     ->setStrokeColor(new Rgb(0, 0, 0))
     ->setStroke(2);
The above example created a path object with the default style of fill and stroke, and set the fill color to red, the stroke color to black and the stroke width to 2 points. That means that any paths that are drawn from here on out will have those styles until they are changed. You can create and draw more than one path or shape with in path object. The path class has constants that reference the different style types you can set:
- STROKE
- STROKE_CLOSE
- FILL
- FILL_EVEN_ODD
- FILL_STROKE
- FILL_STROKE_EVEN_ODD
- FILL_STROKE_CLOSE
- FILL_STROKE_CLOSE_EVEN_ODD
- CLIPPING
- CLIPPING_FILL
- CLIPPING_NO_STYLE
- CLIPPING_EVEN_ODD
- CLIPPING_EVEN_ODD_FILL
- CLIPPING_EVEN_ODD_NO_STYLE
- NO_STYLE
From there, this is the core API that is available:
$path->setStyle($style);$path->setFillColor(Color\ColorInterface $color);$path->setStrokeColor(Color\ColorInterface $color);$path->setStroke($width, $dashLength = null, $dashGap = null);$path->openLayer();$path->closeLayer();$path->drawLine($x1, $y1, $x2, $y2);$path->drawRectangle($x, $y, $w, $h = null);$path->drawRoundedRectangle($x, $y, $w, $h = null, $rx = 10, $ry = null);$path->drawSquare($x, $y, $w);$path->drawRoundedSquare($x, $y, $w, $rx = 10, $ry = null);$path->drawPolygon($points);$path->drawEllipse($x, $y, $w, $h = null);$path->drawCircle($x, $y, $w);$path->drawArc($x, $y, $start, $end, $w, $h = null);$path->drawChord($x, $y, $start, $end, $w, $h = null);$path->drawPie($x, $y, $start, $end, $w, $h = null);$path->drawOpenCubicBezierCurve($x1, $y1, $x2, $y2, $bezierX1, $bezierY1, $bezierX2, $bezierY2);$path->drawClosedCubicBezierCurve($x1, $y1, $x2, $y2, $bezierX1, $bezierY1, $bezierX2, $bezierY2);$path->drawOpenQuadraticBezierCurve($x1, $y1, $x2, $y2, $bezierX, $bezierY, $first = true);$path->drawClosedQuadraticBezierCurve($x1, $y1, $x2, $y2, $bezierX, $bezierY, $first = true);
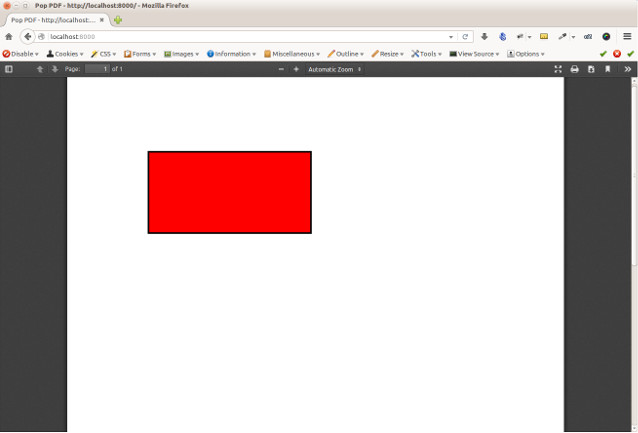
Extending the original code example above, here is an example of drawing a rectangle and placing it on a page:
use Pop\Pdf\Pdf;
use Pop\Pdf\Document;
use Pop\Pdf\Document\Page;
use Pop\Pdf\Document\Page\Path;
use Pop\Pdf\Document\Page\Color\Rgb;

// Create a path object, set the styles and draw a rectangle
$path = new Path(Path::FILL_STROKE);
$path->setFillColor(new Rgb(255, 0, 0))
     ->setStrokeColor(new Rgb(0, 0, 0))
     ->setStroke(2)
     ->drawRectangle(100, 600, 200, 100);

// Create a page and add the path to it
$page = new Page(Page::LETTER);
$page->addPath($path);

// Create a document and add the page
$document = new Document();
$document->addPage($page);

// Pass the document to the Pdf object to build it and output it to HTTP
$pdf = new Pdf();
$pdf->outputToHttp($document);
Layers
As the API shows, you can also layer paths using the openLayer() and closeLayer() methods
which open and close an independent graphics state. Any paths added while in this state will render
onto that “layer.” Any paths rendered after the state is closed will render above that layer.
Clipping Paths
The path object also supports clipping paths via setting the path style to a clipping style. In doing so, the path will render as a clipping path or “mask” over any paths before it.
Text
With text objects, you can control a number of parameters that affect how the text is displayed beyond which font is used and the size. As with path objects, you can set color and style, as well as a few other parameters. As one of the above examples demonstrated, you can create a text object like this:
use Pop\Pdf\Document\Page;

$text = new Page\Text('Hello World!', 24);

// Create a page and add the text to it
$page = new Page(Page::LETTER);
$page->addText($text, 'Arial', 50, 650);
The above code create a text object with the font size of 24 points and added it to a page using the Arial font. From there, you can do more with the text object API. Here is what the API looks like for a text object:
$text->setFillColor(Color\ColorInterface $color);$text->setStrokeColor(Color\ColorInterface $color);$text->setStroke($width, $dashLength = null, $dashGap = null);$test->setRotation($rotation);$test->setTextParams($c = 0, $w = 0, $h = 100, $v = 100, $rot = 0, $rend = 0);
With the setTextParams() method, you can set the following render parameters:
$c- character spacing$w- word spacing$h- horizontal stretch$v- vertical stretch$rot- rotation in degrees$rend- render mode 0 - 7;- 0 - Fill
- 1 - Stroke
- 2 - Fill and stroke
- 3 - Invisible
- 4 - Fill then use for clipping
- 5 - Stroke the use for clipping
- 6 - Fill and stroke and use for clipping
- 7 - Use for clipping
Extending the example above, we can render red text to the page like this:
use Pop\Pdf\Pdf;
use Pop\Pdf\Document;
use Pop\Pdf\Document\Font;
use Pop\Pdf\Document\Page;

// Create the text object and set the fill color
$text = new Page\Text('Hello World!', 24);
$text->setFillColor(new Rgb(255, 0, 0));

// Create a page and add the text to it
$page = new Page(Page::LETTER);
$page->addText($text, Font::ARIAL, 50, 650);

// Create a document, add the font to it and then the page
$document = new Document();
$document->addFont(new Font(Font::ARIAL));
$document->addPage($page);

// Pass the document to the Pdf object to build it and output it to HTTP
$pdf = new Pdf();
$pdf->outputToHttp($document);
Annotations
Annotation objects give you the functionality to add internal document links and external web links to the page. At the base of an annotation object, you would set the width and height of the annotation’s click area or “hot spot.” For an internal annotation, you would pass in a set of target coordinates as well:
use Pop\Pdf\Document\Page\Annotation;

$link = new Annotation\Link(200, 25, 50, 650); // $width, $height, $xTarget, $yTarget
In the above example, an internal annotation object that is 200 x 25 in width and height has been created and is linked to the coordinates of (50, 650) on the current page. If you’d like to target coordinates on a different page, you can set that as well:
$link->setPageTarget(3);
And if you would like to zoom in on the target, you can set the Z target as well:
$link->setZTarget(2);
For external URL annotations, instead of an internal set of coordinates, you would pass the URL into the constructor:
use Pop\Pdf\Document\Page\Annotation;

$link = new Annotation\Url(200, 25, 'http://www.mywebsite.com/');
The above example will create an external annotation link that, when clicked, will link out to the URL given.
Fields
As mentioned earlier, field objects are the entities that collect user input and attach that data to form objects. The benefit of this is the ability to save user input within the document. The field types that are supported are:
- Text (single and multi-line)
- Choice
- Button
Here is an example creating a simple set of fields and attaching them to a form object:
use Pop\Pdf\Document;
use Pop\Pdf\Document\Form;
use Pop\Pdf\Document\Page;

// Create the form object and inject it into the document object
$form = new Form('contact_form');

$document = new Document();
$document->addForm($form);

$name = new Page\Field\Text('name');
$name->setWidth(200)
     ->setHeight(40);

$colors = new Page\Field\Choice('colors');
$colors->addOption('Red')
    ->addOption('Green')
    ->addOption('Blue')

$comments = new Page\Field\Text('comments');
$comments->setWidth(200)
     ->setHeight(100)
     ->setMultiline();

$page = new Page(Page::LETTER);
$page->addField($name, 'contact_form', 50, 650)
     ->addField($colors, 'contact_form', 50, 600)
     ->addField($comments, 'contact_form', 50, 550);
In the above example, the fields are created, attached to the form object and added to the page object.